
- Видео 143
- Просмотров 2 954 555
Horst Carpentry
США
Добавлен 3 сен 2018
A Home Improvement Company in MD
Thank you for watching and hope you enjoy the job
Thank you for watching and hope you enjoy the job
Installing a Floating Floor | Part 2
In this clip I show you how to install a floating floor. In this case it is a laminate style type of flooring. I demo the existing flooring ( carpet ), prep the subfloor, install the padding and then the floor itself. I walk you through all the steps needed for you to do this yourself.
Tools used in this clip:
DeWalt 12" Chop Saw - amzn.to/2zXu777
DeWalt Air Compressor - amzn.to/3c3czoe
Air Hose - amzn.to/2Wo8x2R
Porter Cable 15GA Nailer - amzn.to/2LP1bR4
Porter Cable 18GA Nailer - amzn.to/2z3j5fW
As an Amazon Associate I earn from qualifying purchases. Amazon links help support this these videos.
Thank you for watching and hope you enjoy the job
Просмотров: 2 054
Видео


Installing a Floating Floor | Part 1
Просмотров 1,7 тыс.3 года назад
In this clip I show you how to install a floating floor. In this case it is a laminate style type of flooring. I demo the existing flooring ( carpet ), prep the subfloor, install the padding and then the floor itself. I walk you through all the steps needed for you to do this yourself. Tools used in this clip: DeWalt 12" Chop Saw - amzn.to/2zXu777 DeWalt Air Compressor - amzn.to/3c3czoe Air Hos...

Kitchen Renovation | Skimming Walls & Trim
Просмотров 1,3 тыс.3 года назад
In this clip I wrap up the kitchen renovation project. I skim the lower half of the existing drywall, cut & install trim throughout, install the dishwasher and run a water line for the refrigerator ice maker. Tools used in this clip: DeWalt 12" Chop Saw - amzn.to/2zXu777 Milwaukee 12V Circular Saw - amzn.to/2YRD63C DeWalt Air Compressor - amzn.to/3c3czoe Air Hose - amzn.to/2Wo8x2R Porter Cable ...

Exterior Trim - Garage Door
Просмотров 45 тыс.4 года назад
In this clip I remove and replace the jambs, brick molding ( casing ) and vinyl door sweeps on two garage doors. I use pre-primed 1 x 6 for the jamb work and pre-primed brick molding for the casing. Of course all cuts are back primed for longevity. I fill and caulk all the trim and then apply two coats of paint. I finish the job off by installing the vinyl door sweeps and checking the operation...
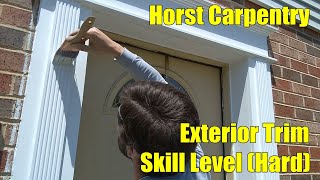
Exterior Trim - Skill Level (Hard)
Просмотров 19 тыс.4 года назад
In this clip I remove the existing storm door and door trim. I install new jambs, head feature and casing (w/ fluted trim and plinth blocks). Then I fill and caulk the trim so its ready for the homeowner to paint. After the painting is completed I return and install the existing storm door to wrap up the job. Video where I detail the head feature trim work: ruclips.net/video/E-_8THZvNOI/видео.h...

Exterior Trim - Skill Level (Medium)
Просмотров 1,9 тыс.4 года назад
In this clip I remove and replace a head feature above a window. I duplicate the original trim with new materials while making sure to back prime all cuts. I hang the new trim using Red Head anchors into the brick and caulk to finish using OSI Quad caulk. The homeowner will complete the painting afterwards. Tools used in this clip: DeWalt 12" Chop Saw - amzn.to/2zXu777 Ryobi Table Saw - www.hom...

Exterior Trim - Skill Level (Easy)
Просмотров 1,5 тыс.4 года назад
In this clip I replace the exterior trim below a window. I first remove the existing plywood and ogee trim. Then I install new plywood and prime the surface. After the primer has dried I cut and install new ogee trim to create the panel effect. All cuts are back primed to make sure the work lasts for a long time. I caulk and fill the ogee trim and caulk the plywood to the brick using OSI Quad c...

Pointing Up A Foundation
Просмотров 2,2 тыс.4 года назад
In this clip I use Mortar to "Point Up" the base of the foundation. Tools Used In This Clip: Rounded Brick Trowel: amzn.to/2VUP75C As an Amazon Associate I earn from qualifying purchases. Amazon links help support this these videos. Thank you for watching and hope you enjoy the job

Removing A Radiator
Просмотров 8954 года назад
In this clip I remove a radiator to improve and balance the heating between the main church space and an adjoining room. The room years ago was open to the main space, but, was enclosed years ago and has had a heating imbalance ever since. The plan was to remove two radiators, but, I decided to only remove one and see if the heating balance is improved. Tools used in this clip: Rigid 18" Pipe W...
Air Filters, Concrete and Door Stop
Просмотров 7374 года назад
In this clip I replaced the air filters in three rooftop HVAC units. Then I do some concrete repair on the handicap ramp that I worked on in a previous clip. I finish up the day by installing a door stop to prevent damage to a key-less entry system unit. Tools used in this clip: Milwaukee 12V Circular Saw: amzn.to/3cuwSdT Irwin Quick Clamp: amzn.to/34LxFEF Brick Trowel: amzn.to/3evLb3G Large Ha...
Hanging Drywall
Просмотров 2,9 тыс.4 года назад
In this clip I hang drywall on a ceiling and bulkhead in a basement. Then I finish and sand the drywall. I will point up the finish coat after the homeowner primes everything. Tools used in this clip: Roto Zip Tool - amzn.to/3b80AoU Drywall Hoist - amzn.to/2V9Qez3 As an Amazon Associate I earn from qualifying purchases. Amazon links help support this these videos. Thank you for watching and hop...
Gutter Repair
Просмотров 3 тыс.4 года назад
In this clip I repair a leaking gutter. I removed the existing sealant from the gutter and then sealed the gutter with OSI Gutter Sealant. Help my channel by making Amazon purchases through this link: amzn.to/38Xt1Eh Thank you for watching and hope you enjoy the job
Ramp Repairs
Просмотров 1,6 тыс.4 года назад
In this clip I use cement to set a post for a handicap ramp gate. Afterwards, I use mortar to point up the block work on the sides of the ramp. Help my channel by making Amazon purchases through this link: amzn.to/38Xt1Eh Thank you for watching and hope you enjoy the job
Minor Window Repair
Просмотров 6454 года назад
In this clip I seal up a leaking commercial window. Help my channel by making Amazon purchases through this link: amzn.to/38Xt1Eh Thank you for watching and hope you enjoy the job
Fan Repair & Thermostat Wire Run
Просмотров 8254 года назад
In this clip I repair a fan with a broken pull switch. Then I run a new thermostat wire from a rooftop unit down to a new thermostat. The Wifi thermostat will not operate without a "c" wire. The existing thermostat wiring was not properly done and did not allow for the additional wire needed. Help my channel by making Amazon purchases through this link: amzn.to/38Xt1Eh Thank you for watching an...
Do you use 2x6 on the roof or 2x8?
I can't remember the exact size lumber that I used for this project, but, I would think it may have been 2 x 10. 2 x 8 would've been a bit small for the span
First thing you do when working with OSB is wear gloves.
Great video series. I lucked out with drilling. Made a jig for drill press. Marked center & drilled . Had 10 & 12 inch marks & just slid holes to them. Also 2 inch for centers. Obviously my home . Wouldn't be worth hauling a drill press to job site
Traveling with a drill press would be on another level. Thanks for watching and glad everything worked out for you
dont use two washers, my suggestion would be a flange nut (Nylock or regular) and locktite
I'm sorry, it's been awhile since I did this work, so, I can't remember exactly what you're referring to. I would guess that I would've used a washer and lock washer under the nut. But, as I said it's been awhile since this job. Thanks for the comment and glad you enjoyed the job
I watched ypur whole series on the deck build. Excellent job. I really liked the way the screeneze looked so we bought it also. Great system but as you noted very pricey. We paid an outstanding crew to do the roof. I felt that was a little over my framing level. Glad we did. They cut out the soffit & opened up the existing roof & tied into the existing roof trusses to get a good pitch. Pretty job. Hard to find guys like this now a days. I actually fired the 1st crew 3 shot days in. To the point of installing screeneze today. Thaks a lot & you seem to be one of those workers that really cares about your work. Keep it up & thanks again
Thank you very much for the kind words. I'm glad that the series helped you to make decisions on your own project. I did like using the screeneze for the screen. It gives a nice finish. It is hard to find people who care as much as you do in the construction field nowadays. Again, I'm glad these videos helped you and thank you for the comment.
Nice !
can someone please explain how to measure this sharp rafter angles if the other end has a birds mouth? how to measure so both sides fit?
If I'm remembering correctly you make the plumb cut of the angle for the new roof and then using a speed square from the top surface pivot out the remainder from 90(deg) the existing roof pitch. So, if the existing roof is 4/12 then angle away from you to 71.5deg. I don't do this frequently enough, but, im pretty sure that is the way. Every time I have to do this it takes awhile for it to come back to me. I hope this is helpful
Nice
how do you measure this extremely sharp egdes of rafters that are leaning to roof?
The top cut on the rafter is a plumb cut that is the pitch of the new roof. The bottom cut should be 45 degrees with a bevel that is the pitch of the original roof. I hope that is helpful for you. I know a lot of people have questions about this portion of the build.
Hi Horst, your series are truly fantastic walkthroughs of any given project - I'm a huge fan and grateful for the time you spend putting these together. Regarding the R-30 fiberlgass insulation and 2" PolyISO under the addition, have the owners encountered any moisture or rotting issues as a result of that installation? It seems it's effectively sealing in any moisture that may get into the insulation zone. I"m building a 32' x 6' covered porch in Vermont atop 2x10s and am leaning towards only using 7.25" R-30 Rockwool, running PVC paneling over bottom of the deck joists, adding two 2" vents, and leaving the remaining joist space as a ventilation avenue. Thank you again for all your videos!!
I haven't been inside those bays to check for any moisture issues. The main reason that I installed that foam board was to maintain insulation under the ductwork. You're right about the moisture issues being possible, but, I can't say for certain without putting eyes on it. Thanks for the kind words. I'm glad you enjoyed watching the job. Good luck with your project
How big was your rough opening in comparison to the actual door
Maybe an extra 1/2 inch in both directions. It's been awhile, but, I think that's what I did. You'll have about 1/4 inch all around. I hope this helps. Thanks for watching
about 6 years late but how come you install right on old shingles.
I've always just framed right over the existing roof for speed. There's no real reason to remove the existing shingles, but, you could if you prefer. I always cut away the shingles as needed before weaving in the new shingles from the addition. I'm always in a rush once I start this kind of project to get it under roof, so, speed is my main concern. Thanks for the comment....I can't believe it's been 6 years already
Excellent video. Love to see a carpenter with knowledge of the various classical architecture components. Reminds me of the Brent Hull moulding work.
Thank you for the comment. I'm glad you enjoyed the project
Here is the thing the only thing to remember if your happy with it that's all that counts. People will always pick your work apart after the fact its finished and they didn't help . so I always say to those people where were you when I was doing it good work my friend
Hey thanks I appreciate that.... I take it all with a grain of salt. Everyone has their opinions. Thanks for watching
Great video! Do you have a video showing how you tie in the new roofing shingles in the valley to the existing roofing shingles or do you know where a good video may be on RUclips? Can I ask why you didn't remove the roofing shingles underneath the gable roof addition? I thought that you are always supposed to remove them. Thanks.
I'm sorry, but, this is the only video where I weave into an existing roof. I don't have any video that I can recommend to you. You could remove the shingles underneath the over framing where the new roof ties into the existing house, but, you do not need to remove them for it to be built. Anyone that I've worked with in the past has chosen not to remove them, so, it is normal to me. Thanks for the comment and I'm glad you enjoyed the job
Great to see a DIY job with real issues to fix, like the wavy floor. Top job.
Thank you and I'm glad you enjoyed the job
That drain pipe is running water to nowhere so likely going under the house and eroding your foundations
What kinds of woods did you use for exterior sir?
I used pre-primed pine for all the trim work. Thanks for watching
You’re the man, no leveling clips and not afraid to build up a little (instead of self leveling) to get flat. Great job
Thanks, this was some wild tile work
11:00 I notice you don't like to use joist tape (black butyl that comes in 50' rolls to protect exposed edges), but assume that's a choice you made specifically for the enclosed portion of the screen porch.
I think you basically re-discovered an old geometric axiom, that the diagonals of a trapezoid can ALSO be equal, just like a rectangle. I'm always making boo boos like that dang rim beam SNAFU. Glad to know I'm not the only one.
What kind of scaffolding platform are you using there... a folding ladder? (Nope, an 8' extending plank, you mention later.)
So you never ever add wood preservative to your cut ends? Some people are religious about that (I'm in the middle), though today's PT lumber is so crappy it rots and splits the moment you turn your back, anyway. Especially the stuff from HD or Lowes.
I've never used that stuff before. I have another business that I use if I need PT lumber with more preservatives.
20:00 Yeah, suggest never pre-drilling for any of the LedgerLOK, HeadLOK, ThruLOK series.
17:00 One alternative way to deal with the mismatch between your 3" beam and the 2x4's you're installing there would be to lay the cripples at 90-deg., with their wide side flush against the outside. Gives you plenty of structural strength for the roof (not that any is really needed) plus more nailing surface for the siding. Anyway, that's how I do mine. 🙂
Thanks for the tip 👍
12:00 Although I haven't tried it, I wonder if some slender stainless steel brads would serve better fastening down that T-111 to the knee wall. Screws always seem to chew it up and promote rot, whereas stainless (maybe aided by some construction adhesive) should give plenty of grab without the gouges.
I agree with your opinion, but, my jobs are dictated by my customers. The customer changed his mind and wanted the T1-11 covered with siding, so, in the end it wouldn't have made much of a difference. Very few customers will pay for stainless fasters, which, is what settles this kind of discussion. Thanks
9:30 I may have to dispute the claim that deck screws can or should be used as "utility screws" (i.e. installed anything but vertically straight down). They are hella brittle compared with true construction screws and, of course, 10p or 12p nails.
Thanks for the comment
18:30 I'm scratching my head about how your shallow cuts for the high side of those roof rafters came to be calculated. Gonna watch to the end to see how you bridge the resulting gap, since you obviously planned it. But if you had to do it over again, why not have those rafters "sitting on" the existing roof as much as possible?
Thanks for watching
What's your price range in this type of endeavor? Just curious .
The cost of the porch work was 17.5k in early 2019. This would probably be considerably higher now with the increase in material pricing. I've also been told that my pricing is low. I hope this helps you. Thanks for the comment
Thank you sooooo much my friend !!!!
Square work!
Thanks 👍
Holly shiiit man are you building helicopter platform for leading ? lol , you're uesing too much wood man lol
Better overbuilt than underbuilt 😂 Thanks for the comment. Glad you enjoyed the job
As a skilled carpenter of 40 years experience. This guys DYI porch roof isn't the correct way of building the project.
Thanks for watching
A pleasure to watch you work; reminded me of watching my father. BUT, that work deserved a new, matching storm door!
Thank you so much for the compliment. I'm glad you enjoyed watching the job
How long did these two doors take?
I completed the entire job in just a couple of days. I wanna say three days, but, I tend to work shorter days. Thanks for watching
Thank you! I found our rake extentions are just OSB with no supports. You showed me how to resolve this simply without having to notch out rafters. Woo hoo! I can do this! ❤️ - Marisa
I'm glad that this video will help you with your repair. Thank you for the comment
Your location ? You can work west alabama?
I'm live in Maryland and I do not travel for work. I'm sorry I wish I could help you more. It's hard to find a good contractor nowadays. Thanks for watching
Nice job. I watched them all. What do you charge for a 3 season room
Thank you and it might cost almost 20K now. Glad you enjoyed the job
@@horstcarpentry includes materials
Yep 👍
But I've been told my prices are cheap
@@horstcarpentry where are you located. I'm in Nebraska
Always use exterior torx screws instead of nails.
You have to cross brace those joists. That way they won't warp and it'd fix that one warped board.
The part I really wanted to see in detail was the part that was rushed through at fast forward, with no verbal comments.
I'm sorry about the clip not being as helpful as you would've wished, but, thanks for watching
Wow, beautiful job.
Thank you very much for this video, exactly what I was looking for- to extend the roof and build soffits as existing roof edge doesn’t protect siding and windows from elements.
You're welcome and I'm glad this video could help you. In a perfect world you could extend your framing back through to tie into your "second" truss/rafter while cradled by your first truss/rafter. This would make for a stronger overhang. Thanks for watching
@@horstcarpentry Thank you very much for this advice, next week the contractor will come with the plan of work and now it will be easier to understand the options for extension; complicated task as our 1975 roof splits into two parts with one regular slope connected to the short vertical wall with skylight windows ( where the leak is) and cathedral ceiling below it. It will be interesting to see what solutions the contractor will have to build the soffit- just along the roof ridge or maybe along the slope as well. THANK YOU, your video is the only one on RUclips that shows how the extensions should be constructed!
Well thank you and I'm glad it could help you with your project. Remember, depending on how your roof is constructed you could tuck the framing back into the first true truss/rafter. If he brings that up (or maybe you could ask if he could build it that way) as an option it's the strongest way to go. The way I built it here will work though and many companies build overhangs this way. I hope everything works out for your project. Thanks again
if you were going to replace your cabinets would you recommend placing tile underneath the cabinets as well? We have a similar project and are wondering what most do with the dishwasher, cabinets and , in our case, a gas stove.
Not having tile underneath the cabinets allows you to easily install the toe kick and in case you need more height underneath the counter for the dishwasher etc you could leave it out. Thanks for watching
Any materials list? I'm looking to same size project with almost identical roof situation. Thanks !
Sorry, but, no I don't have the materials list available. Thanks for watching
Where have you been. I’ve been looking for new videos. Hope you get back to RUclips soon
Just wondering: is it possible to support the joists on a ledger board?
Yes, you could hang the joists off a ledger using hanger brackets. I felt that it was nicer and more permanent to set them back onto the existing top plate of the wall. Thanks for watching
It would be great if there was a carpenter out there that would post a video doing exactly what's being done here, and using the imperical method
Thanks for watching
Looking forward to seeing the new videos
Thanks for watching. I will be back to RUclips